antique ·
butcher block table ·
DIY ·
DIY furniture ·
DIY tables ·
kitchen island ·
rustic ·
rustic modern ·
woodworking ·
work bench ·
How to make your own kitchen island
Materials:
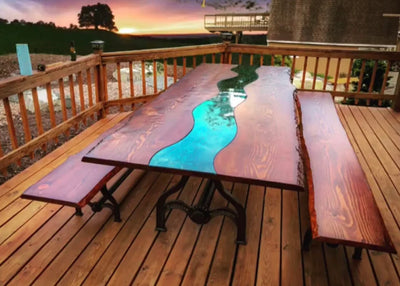
- Live edge top or butcher block top
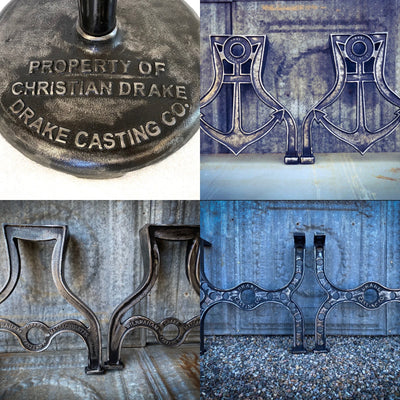
- 2 Drake Kitchen Counter Iron legs
- Lag screws
- Ratchet
- Saw or jigsaw
- Sandpaper
- Stain or paint
Instructions:
1. Measure the size of your kitchen island and cut the wooden boards accordingly. The size will depend on your preference and available space.
2. Sand the surfaces of the wooden boards to make them smooth.
3. Attach the wooden boards together using lag screws and a ratchet. Make sure the screws used with washers.
4. Sand the edges of the island to make them smooth.
5. Stain or paint the wooden boards with your preferred color or finish. Let it dry completely.
6. Attach the iron legs. Make sure they are secure and in the right position.
7. Flip the island over and check if the legs are level and sturdy.
8. Your custom kitchen island with iron legs is now ready for use!
Note: These are general instructions and may vary based on your specific materials and tools. Always wear protective gear and use caution when using power tools.
Leave a comment